Friday, September 23, 2011

Chicken Cordon Bleu...in a Crockpot

Okay, so I wasn't so creative with the side dishes.  In my defense we arrived home from one of the girl's softball game at almost 6:00 p.m. and I was mainly concerned with getting dinner on the table.  However, since I haven't posted this recipe before we get the canned veggie side dishes and the egg noodles that cook up in seven minutes.

My kids ALL liked this, and with five sets of varying taste buds that is a huge accomplishment.  This started as a freezer meal that was thawed completely by allowing it two days in the fridge.  We knew in advance we had some crazy scheduling this week, but I understand that doesn't always make a great freezer meal for some families.  With the cheese in the chicken I'm not sure how a microwave defrost would affect the overall taste and texture and don't recommend it.

4 boneless, skinless chicken breasts fileted
4 large slices of swiss cheese
4 large, thin slices of ham
1 can cream of chicken soup
1/2 cup milk

Filet the chicken breasts in half to yield 6 long thin pieces.  I am not a top notch chef so mine do not end up in equal sizes.  This isn't a problem in my family as the kids usually want a smaller portion anyway, but it is something to note if you need to increase the number of chicken breasts you are using.  Layer 1/2 of a ham slice and 1/2 of a slice of swiss cheese on each piece of chicken lengthwise.  Roll each piece of chicken with the ham and cheese on the inside and secure with a toothpick.

To freeze, place the rolled chicken in a freezer bag.  I double bagged mine because of the toothpicks.  I don't know if this was necessary, but I was concerned of puncturing through the freezer bag.  It wasn't so much freezer burn as I knew it was only in the freezer for the month as much as the concern of the raw chicken juices leaking while the chicken thawed...


Freezer bag label: Thaw completely, place in crockpot and cover with 1 can cream of chicken soup mixed with 1/2 cup milk.  Cook on low in crockpot 4 -5 hours.

If you choose not to freeze this, place the chicken in a crockpot and cover with the cream of chicken soup mixed with milk.  Cook on low in the crockpot  4 - 5 hours.  If you have a small crockpot you can teepee the chicken so they are all in a single layer.

Please remember crockpot cooking times typically assume your crockpot is 1/2 - 2/3 full.  The chicken may dry out if you have a seven quart crockpot and are only cooking 8 pieces of chicken.

Wednesday, September 21, 2011

Canning Salsa...

So I've made jam and love it.  I decided last year to start canning more.  We canned pears and it was a huge hit.  We tried peaches and they weren't freestone so it was a disaster.  Apricots bombed too.  It's been a live and learn experience.  Hence, I needed to rebuild my confidence and at the beginning of summer canned more jam and syrup.

So, with confidence back up I decided to try salsa.  We consume huge amounts of salsa in our house, but I have always been scared away from anything that involves vegetables when it comes to canning.  I don't have a pressure canner as of yet, and I didn't want to try my luck with my pressure cooker and hope I was measuring the pressure correctly.  When I discovered canning salsa could be done safely with a hot water bath I jumped in.

Now this is my first attempt meaning I researched and looked for recipes hoping not to come up with something that would end up not tasting well or would be a complete failure.  I came across a recipe at food.com that looked promising and decided to give it a try.  HOWEVER, I have researched enough about canning salsa that I knew it was not advised to go over a 50/50 ratio between tomatoes and other veggies, and this recipe is a little vague in the measurements.  Hence, I tried to be a little more specific in the measurements of what I did, which I'll list below.  Also, I used roma tomatoes so I lost a little more liquid than I would have had I used the plum tomatoes that the recipe called for.   I processed mine in multiple batches experimenting with heat from the jalapenos.  You can adjust as you see fit.  For a mild salsa I seeded the anaheims and the jalapenos.  For a medium heat I left the seeds in the anaheims and in a couple of the jalapenos.  The peppers are completely interchangeable and you can use bell peppers, yellow peppers, whatever you prefer.


20 cups firm tomatoes, chopped and seeded
Pickling salt
1 small can tomato paste
6 cups onions, diced
3 cups cilantro, chopped
1 cup garlic, minced
7 cups anaheim peppers, chopped
3 cups jalapeno peppers, chopped and seeded
3 Tbs lime juice for every pint jar (I didn't use fresh limes...I was too cheap and lazy)

With the roma tomatoes it took about forty tomatoes to get a twenty cup yield.  I peeled the tomatoes dropping them in boiling water for about thirty seconds and then placing them in an ice water bath.  This was so easy my eight and eleven year olds ended up peeling most of the tomatoes for me.  The tomatoes were then cored and chopped and laid on a cookie sheet.  I LIGHTLY sprinkled pickling salt on the tomatoes after the cookie sheet was covered and then repeated after another layer of tomatoes filled the sheet again.  The tomatoes were then placed in colanders to drain off excessive liquid while I started the water in my hot water bath and began chopping the rest of the veggies.  I usually sterilize my jars through a hot water wash and heat dry cycle about now also.

When it looked like the water bath was close to boiling I sterilized my lids and rims in a small pot on the stove top. As soon as the hot water bath is ready and the dishwasher has run through it's cycle so the jars are hot, I added a small amount of tomatoes and the tomato paste to my pot and stirred until there were not lumps in the paste, then I added all the vegetables.  DO NOT add the lime juice yet.  Stir the ingredients together and bring to a boil.  I had one batch of tomatoes I used that were a little riper than I would have liked.  They were good quality tomatoes, but they lost a little more juice when I was draining them.  I remeasured these before mixing them together and adjusted down my vegetables just to be safe.  I honestly don't know if this is necessary, but I do know you can't go wrong safely canning salsa with more tomatoes in the recipe and you can go wrong with too many other vegetables...let's just chalk this up to better safe than sorry.

As soon as the salsa reaches a boil, add 3 tablespoons of lime juice to your pint size jars, 6 tablespoons to your quarts.  Fill the rest of the jar with salsa, leaving one inch of head space. Wipe the rims clean and seal your lids.  Once you have enough prepared to fill your waterbath, place the jars in the water bath and return it to a boil.  You want about one inch of water covering the jars.  I processed my jars for fifteen minutes and I am about twelve feet above sea level.  This was from the FDA guidelines.  They recommend twenty minutes 1,000 - 6,000 feet and twenty-five above 6,000 feet.  Do not start timing until the water has returned to a boil.

When the jars are finished processing, remove from the water, and set aside until you hear that wonderful popping sound.

So far so good, and I'll let you know if I find any others worth sharing, but so far it was a positive experience.  I plan to do some more research and try some other recipes just because this is a very chunky salsa and only appeals to about half my crew.  I'll need to work on adding another more blended salsa to the pantry so everyone is happy!

Saturday, May 7, 2011

Lettuce Wraps

First, let me just say I have never been to PF Chang's.  With that said, I know this is a copycat recipe, and for any PF Chang fans out there, I apologize in advance if this does not resemble the real thing.  HOWEVER, even if this doesn't resemble theirs, my family finds this worth making.  This is not a leftover meal.  I froze a little the last time we made them, and I'll be defrosting it within the next week to let you know how it holds up as a freezer meal.  You won't be freezing the lettuce of course.

The page I picked up the recipe from is Wasabimon.com.

Did I do anything different?  Yes, but only because I was using what I had, not because of any culinary insight.  I used regular sesame seed oil, and the dijon mustard I had was not the "good stuff" but a store brand.  Also, I did not have fresh lemons, so I did use lemon juice from my fridge.  The verdict...they were still AMAZING.  We had no leftovers either time I have made them.  The only reason I was able to put some to the freezer test is because I put it in the freezer before we started eating.  Even if I can only freeze the cut chicken ahead of time this recipe is staying as a regular in our house.  If for any reason the link doesn't work let me know and I'll send you over the recipe I have printed from the website.

By the way...this has moved so high up our favorites list it is what I requested for my Mother's Day dinner...the bad news - I think I'm prepping it today. Such is life.

Sunday, April 17, 2011

S'more Cereal Bars

We discovered this recipe on the back of some generic marshmallows.  I have tried to locate the recipe online to give credit somewhere with no luck as of yet, so I'll post it here to share.  I used it today with some Young Women handouts and my kids devoured all the extras.  Let me add that I made a double batch, so it is impressive that they ate ALL the extras!


1/2 cup peanut butter
2 Tbs milk
1 package miniature marshmallows
3 1/2 cups Cocoa Puffs
3 1/2 cups Golden Grahams
1/2 cup peanuts


In a large heavy bottom saucepan stir together peanut butter, milk and marshmallows until melted.
Remove from heat and stir in remaining ingredients.
Immediately pour into 9x13 pan and press down evenly in pan.
After the mixture has cooled, cut into 24 pieces. (For my handouts I only did 12 in a pan)

The original recipe only calls for 6 total cups of cereal, but I think they are a little TOO sticky and gooey if you don't add the extra cereal.  My general rule of thumb is if you add more to your homemade rice crispy treats, add more here also.

Wednesday, April 13, 2011

Cooking for the Month of April The Plan

We actually traveled for Spring Break this year.  We drove to Texas and stopped in New Mexico on our way back.  We had such a great time.  HOWEVER, every time we have a big trip I forget to schedule a couple days just to catch up.  Our first week home was full of play practices, church activities, volleyball and choir practices.  Needless to say it's taking a while to catch up.

I did start my freezer meal cooking for the month of April.  We had used all but two of our freezer meals before we left, so it was a mad dash and not nearly as much planning as usual.  So, why would I share the chaos version of freezer meal cooking?  The simple reason is I don't want people to think there has to be a perfect plan.  It's okay to wing it when needed, and it's absolutely okay to slow down and work with your schedule when necessary.

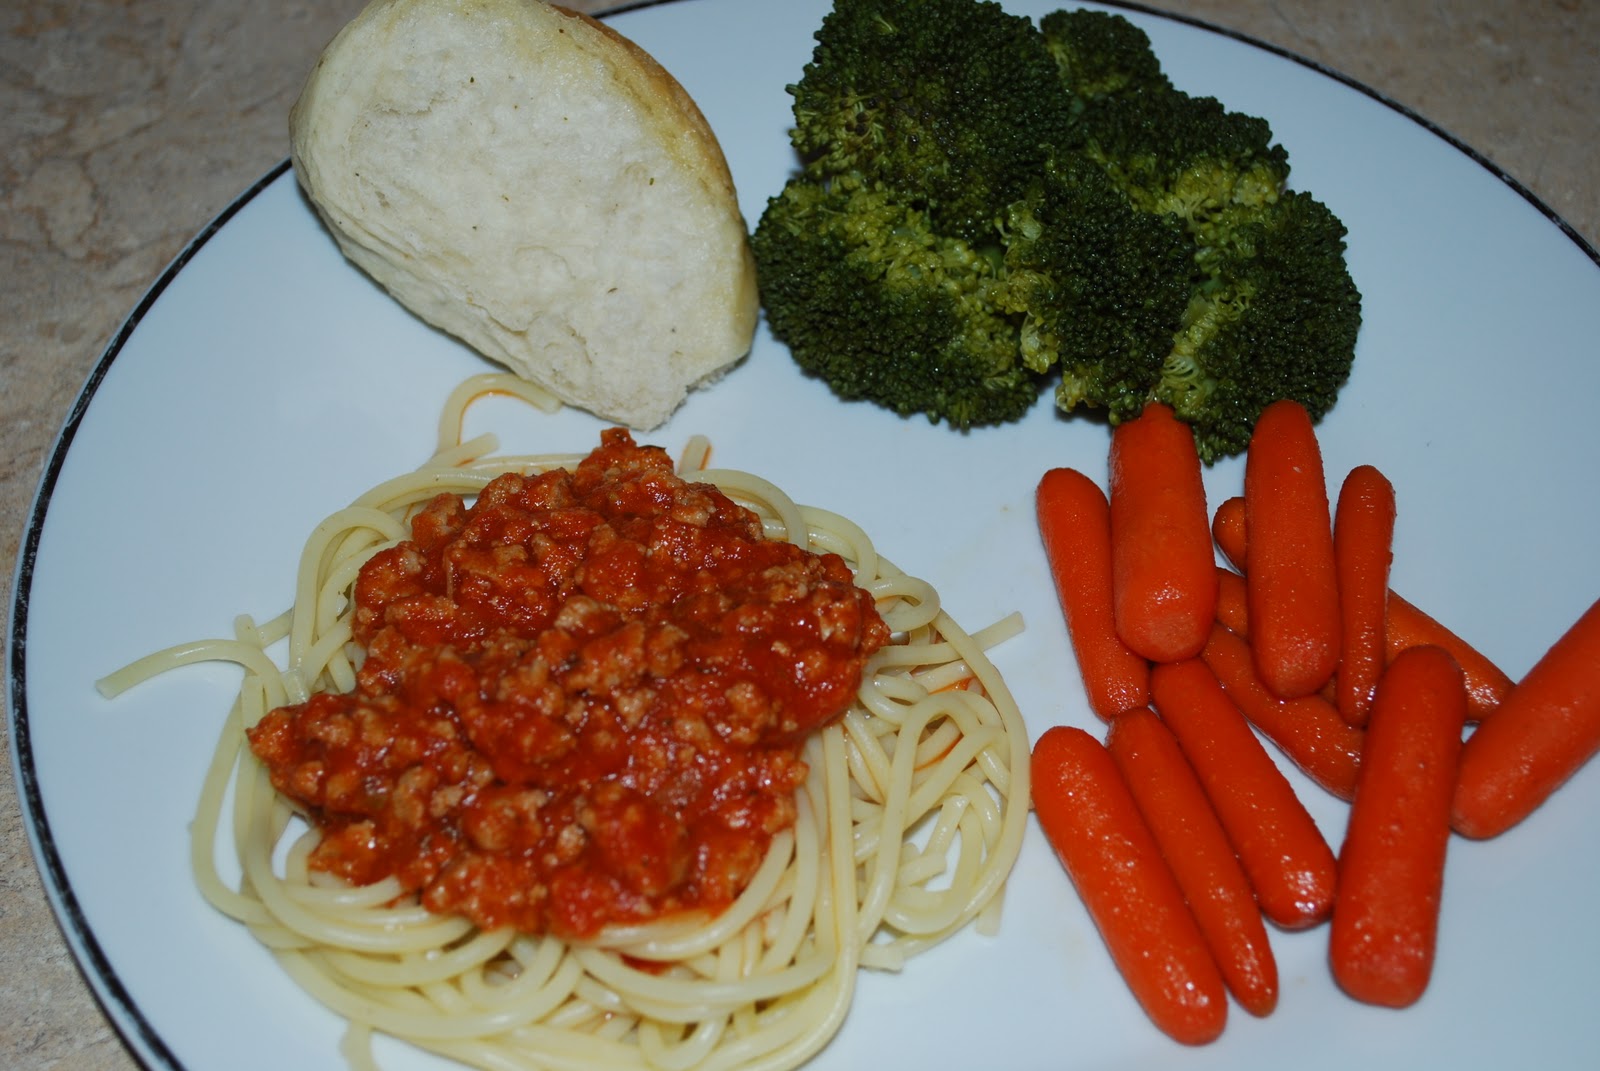
The mainstay of this month's menu was boneless skinless chicken breasts.  Our Sam's Club allows you to purchase a case of approximately fifty pounds at $1.66/lb.  This is by far less expensive than most sales, and it's a constant price so I don't have to worry about purchasing and cooking during the sale.  In addition, even though it's a "case" of chicken, it's really a box of their prepackaged chicken breasts in the display case so it's easy to work with.  Also, every package is individually labeled.  If you're thinking you can't use fifty pounds of chicken, think about teaming up with a friend and splitting the cost.  We also purchased 5 pounds of ground turkey, simply because tacos are a mainstay in our home and we can't live without them.

This is an approximate breakdown of how the meat was separated.  Please keep in mind I plan meals for six or more.  If your family is smaller, cater your menu to your needs.


Mexican Lasagna - 14 pounds (4 recipes)
Chicken for Chicken Alfredo - 7 pounds (5 recipes-I use 1 1/2 breasts for each meal)
Chicken Parmesan - 2 pounds (1 recipe)
Chicken Francese - 2 pounds (1 recipe)
Orange Chicken - 6 pounds (3 recipes-we make A LOT the kids INHALE this)
Thai Peanut Chicken - 2 pounds (1 recipe)
Stir Fry - 3 pounds (2 recipes)
Southwest Chicken Salad - 1 pound (1 recipe)
Chicken Enchilada Soup - 2 pounds (2 recipes)
Creamy Crockpot Chicken - 6 pounds (3 recipes)
Lettuce Wraps - 4 pounds - (was suppose to be 2 recipes, but the kids REALLY loved these and ate a little more than one recipe, so we froze what was left to use for when I have lunch company)
BBQ Chicken Salad - 1 pound (1 recipe)
Taco Meat - 5 pounds (4 recipes-we'll use the meat for Tacos, Taco Soup or Taco Salad)

I can't BELIEVE I haven't posted the Creamy Crockpot Chicken recipe yet, and will post it with the others soon.  We have already made the Lettuce Wraps, so that will be up soon also, but the others...well, they are new recipes, so you'll find out how they taste with us.

What's Next?
You have your food prepped, it's bagged and frozen, and you're not sure what to do.

Make a calendar.  One of our new favorites is Cilantro Lime Shrimp.  I bought 2 pounds of shrimp to make that this week, and we have pizza EVERY Friday.  So, the other item in our freezer is a HUGE bag of pepperoni.  Between all this and the chicken, we have 34 dinners, plus the southwest chicken salad was planned for lunch a weekend we have company.

I started my calendar on April 2nd.  We will be gone Easter weekend, so there were three free days.  With all this, we have our menu planned through Monday, May 9th.  One of the main things we look at when planning our menu is game schedules.  We have a volleyball player in our troop, and the games can go until 6:00 p.m. about 30 minutes from home.  Those nights always end up with a crockpot meal or a salad.  All the work can be done in advance, and we're ready to eat as soon as we get in the door.  The joy to planning is it eliminates the need for fast food stops on those crazy nights.

This post is getting really long, so I'll just finish up with a couple quick notes.  All of these meals require something more than what's in the freezer.  I don't have the space in my freezer to keep the full meal, and some things just don't freeze as well as others.  With that in mind, the last key to success is making sure you have supplies on hand for the night you are planning to use your frozen food.  For example, with the chicken alfredo we only freeze the chicken.  Because we made enough for five dinners, I also purchased enough pasta and alfredo sauce for the five dinners.  If you need to, label what's in your pantry to make sure it's there when you need it.

Last, the way I do freezer meals does not eliminate grocery shopping through the month.  We go through a lot of milk and fresh fruits, and as you can see salad is a frequent on our menu plan.  I do try to think about side dishes and plan according to keep shopping minimized to once a week when at all possible.  If you have room in your freezer for frozen vegetables, you may have a little more flexibility than I do.

This may seem like a lot, but I promise it is absolutely worth every ounce of effort you put into it.  I cooked over two days total, with stops in between for laundry, dishes, and everything else that goes with getting back from vacation. More to follow on the cooking details.

Wednesday, March 16, 2011

Garlic Lime Chicken

This recipe wins in all categories.  First off, two of my favorite things are garlic and lime.  Second, it's a freezer meal. Third, it's diet friendly. And last, it is flexible in preparation; it can be cooked in a crockpot or you can marinate the meat and cook it on a grill.  How can you possibly go wrong?
Yes, after I took the pretty picture I did add sauce to my rice and chicken...I'm a saucy kind of girl...

2 pounds boneless, skinless chicken breasts
1/2 cup low sodium soy sauce
1/4 cup lime juice
1 Tablespoon Worcestershire sauce
2 cloves garlic, pressed
1/2 teaspoon dry mustard
1/2 teaspoon black pepper


If you are marinating the meat, stab the chicken and place in a gallon size ziploc freezer bag.  Combine the other ingredients and pour over the chicken.  Marinate at least 2 hours and grill.

If you are using a crockpot place the chicken in the bottom of your crockpot.  I find a 4 quart works great for this recipe.  Combine the other ingredients and pour over the meat.  Cook on high 3 - 4 hours, or low 6 - 8 hours.  If you can, turn the meat about half way through.  Also, if you are cooking in a larger crockpot this will cook MUCH faster.  Check your meat frequently or double the chicken.  There is no need to double the sauce, there will be plenty.

For those who are counting calories...I cut the chicken as best I could into 4 ounce pieces before I placed it in the crockpot.  With the chicken I purchased, it four chicken breasts allowed for approximately two and a quarter pounds of chicken.

To prepare as a freezer meal.  Place the chicken in a labeled ziploc freezer bag.  Combine the other ingredients, then pour into the bag.  Again, if you plan to grill the chicken, it's best to stab the chicken first. For grilling, thaw overnight in the refrigerator.  The meat will marinate while it's thawing.  For crockpot cooking, on cooking day place the items from the bag in the crockpot and cook as above.  If you cook from frozen remember your cooking time will be on the high side.

We usually serve this with rice and steamed veggies.  LOVE IT!!!

Nutritional information per Spark People Recipe Calculator

For each 4 oz serving of chicken:
115     calories
0.5 g   fat
2.3 g   carbohydrate
0.1 g   fiber
0.5 g   sugar
24.1 g protein

Tuesday, March 15, 2011

Cinnamon Rolls

Not to pat myself on the back, but these cinnamon rolls are absolutely AMAZING!!!  I had promised them to my young women for their presidency meeting Sunday, so I'm posting the recipe to share with all the rest of you cinnamon roll lovers.

2 teaspoons active dry yeast
1 cup warm milk
1 teaspoon sugar
1/3 cup margarine or butter, softened
2 eggs, beaten
4 cups flour
1 teaspoon salt

Dissolve the yeast and the sugar in the milk.  Wait about five minutes to be sure it proofs.  I have found from sharing this recipe in the past it is really easy to overheat the milk, and you don't want to kill the yeast...it's easier to redo the yeast than the entire batch of dough.

Add butter, eggs, flour and salt.  Knead together until you have a smooth ball of dough.

Place dough in a bowl and cover with a warm damp towel. Allow the dough to rise until it is double.  This is a heavier dough, so it may take a while.

Mix together the filling while the dough is rising:
1 cup brown sugar
2 1/2 Tablespoons cinnamon

On a floured surface roll it out to about 1/4" thick. The idea is to get 1 dozen good size rolls from this dough. we make them a little smaller, so my kids feel as though they were able to eat more.
Spread evenly 1/3 cup butter or margarine across the surface of the dough.  Sprinkle the filling over the butter.  Roll from the widest side of the dough to make a roll. Cut into even pieces, approximately 1-1/2" for smaller rolls and 2" for larger rolls.

Place the rolls onto a greased baking sheet and cover with a warm damp cloth. Allow them to rise for 30 minutes.
Preheat oven to 400.
Bake for 10 - 12 minutes.

Icing
1/2 cup butter, softened
1/4 cup cream cheese softened
1 1/2 cup powdered sugar
1/2 teaspoon vanilla
1/8 teaspoon salt

Beat together while the rolls are baking.

Chicken and Potatoes...on the lighter side.

The weather is warming, and it's time to face the reality a swimsuit may have to worn this summer.  In an effort to do so, I tried to find some new recipes that were a little less on the calorie count.  I found this amazing website, Skinnytaste, that I am now in love with.  We tried her recipe for Baked Chicken with Dijon and Lime tonight.  It was absolutely amazing.  Because I have a family of seven, I did increase the chicken from 8 pieces to 12.  The younger kids only ate one piece each, so it was plenty and the hubby even has two pieces for lunch tomorrow.  I was worried about the salt generously part, so I used about a half tablespoon of sea salt.  I also forgot to press the garlic clove into the sauce before I tossed the chicken, so I pressed garlic and spread it around on top of the chicken thighs in the pan.  It worked great.

As a side I roasted potatoes.  My kids love the onion soup mix roasted potatoes, but again, there's a ton of sodium in the package, and it calls for three tablespoons of oil.  This was our homemade lighter version:


Oven Roasted Potatoes
4 pounds red potatoes, washed and cut into 1 - 2" pieces
4 teaspoons olive oil
2 Tablespoons dry minced onion
2 teaspoons garlic
1 teaspoon salt


Preheat oven to 400
Spray a 9x13 pan with non-stick cooking spray.


Mix together dry ingredients.
Toss the potato pieces in the olive oil.
Add dry ingredients and toss until coated.
Spread evenly in greased pan.
Bake 40 minutes or until potatoes are tender when poked with a fork.  To brown the potatoes, after the 40 minutes I turned to broiler on high, leaving the pan on the center rack, and left them in the oven about five more minutes. DELICIOUS!!!


Okay, this is where I made my fatal mistake.  I have garlic, fresh garlic, I don't know why I opted for the granulated, but I did.  I will make it next time with the fresh garlic and let you know how things go.


Using a recipe calculator online I came up with the following nutritional information.  Please remember this is and online tool, not a science lab...


Serves 10 (I think we got closer to twelve even servings from the pan, but I didn't measure exactly so I'm erring high on the calorie count)
Calories
151.9
Total Fat
2.1 g
Saturated Fat
0.3 g
Sodium
243.8 mg
Carbohydrates
29.9 g
Fiber
3.2 g
Protein
3.6 g

To top the meal off we served steamed broccoli. It was wonderful, and I'm excited to see if we can make the chicken as a freezer meal!  Wish us luck.

Thursday, March 10, 2011

Soft Pretzels

We made these last night to test on my family, then made then tonight for Young Womens.  They were delicious!  The recipe I had was a little too dry to work with, so I ended up with the following.  Not one left at the activity, and the family was certainly eager to eat what wouldn't fit on the tray for Young Womens!

In a small bowl combine:
1 1/2 cups warm water
4 teaspoons active dry yeast
1 teaspoon sugar
Dissolve the yeast mixture and set it aside for about ten minutes.

In your mixing bowl mix together:
4 1/2 cups flour
1/2 cup sugar
2 teaspoons salt

Make a well in the middle of the dry ingredients and add:
1 Tablespoon oil
and the yeast mixture.

Mix together and knead for about ten minutes.  Remember soft pretzels are a little heavier than traditional bread so kneading the dough may give you a workout.  I like to start mine in the Kitchen-Aid, then knead the last four or five minutes by hand.
Set aside in a greased bowl until the dough is double, about one hour.

Once the dough has risen, divide into 16 equal parts.  Make a long rope from the dough and shape into a pretzel.  Bake on a greased cookie sheet and bake at 450 for 8 minutes.

If serving right away, brush generously with melted butter and top with salt or cinnamon and sugar.  If you will be serving these later, reheat in the microwave for about fifteen seconds, then top with melter butter and salt or cinnamon sugar.

Wednesday, March 9, 2011

Glazed Carrots

Yes, this is a spaghetti dinner and I figure most everyone can work that one out on their own.  But, the carrots are a great addition to many meals in my home.  As far as I'm concerned any vegetable they ask for is worth sharing.

2 cups baby carrots
1 Tablespoon butter
1 1/2 Tablespoons packed brown sugar

Combine all ingredients in a frying pan and heat on medium heat until the carrots are tender stirring frequently.

Monday, March 7, 2011

Stir Fry, home cooking made easy

Okay, so this is not a recipe post, but to show that even we have our nights of cheating.  They sell a bag of stir fry veggies at Sam's Club.  Everything in one bag, it comes with two sauce packets, and my kids like bits and pieces of what's included...Craig and I like the whole thing.  We knew yesterday was a cook dinner as fast as you can night, which in our house means stir fry night.  Now, I do like to add a little protein in the mix, so we customize ours.


We take the bag of veggies, divide it into two gallon size ziploc freezer bags.  Add one of the sauce packets to the bag.  Then, when we are cooking chicken for the rest of the freezer meals, Craig cuts a couple chicken breasts for stir fry, throws them in their own quart size freezer bag and we put it inside the gallon size ziploc with the veggies and sauce.


Yesterday the bag was thawed and two cups of rice later...dinner was on the table.  Now, in case you have never cooked stir fry before, you want to cook the chicken first, we use a little sesame seed oil, or a small amount of olive oil and a little soy sauce.  After the chicken is done, remove from the pan and cook the veggies.  They will cook for three - five minutes.  Return the chicken to the pan and add the sauce. 

The moral of the story....A home cooked meal doesn't always have to be fancy.  Freezer meal cooking doesn't mean it always has to be cooked by you.  And the most important thing is you have a plan.  All your family really cares about is that you are at the dinner table together.

Thursday, March 3, 2011

Taco Soup

I can't take credit for this recipe in any way shape or form.  I know it's been circulating around for years, but it is a go to in our home.  I do something a little different from the original recipe I was given in that I season the meat a little before adding it to the soup because this is a hybrid freezer meal for us.

Taco Soup
1 pound ground beef or turkey, cooked and crumbled
1 can pinto beans, drained
1 can kindney beans, drained
1 can black beans, drained
1 can diced tomatoes with juice
2 Tbs cumin
1 1/2 Tbs chili powder
1 1/2 Tbs minced onion
1 Tbs garlic
1 tsp salt
5 cups water

Combine all ingredients in a large pot.  Heat to boil then reduce heat and simmer approximately 20 minutes. Add or reduce water according to personal preference. Serve with shredded cheese, tortilla chips and sour cream.

***1 package of taco seasoning can be substituted for the seasonings.

If you are really ambitious you can make this meal from dried beans.  We've done it successfully a few times.  The biggest problem is remembering to start the beans early enough that they cook properly.  I count on about 3/4 cup of dried beans in place of each can.  Again, they do need to be drained, so when we have cooked it with dried beans I usually cook the beans, then add them to the soup.

Hybrid freezer meal details: We cook all our taco meat for the month at once, and I do season the meat together.  I usually use lean ground turkey in place of ground beef.  Because there is minimal fat, I do throw my seasonings in at the beginning of browning the meat instead of at the end after the fat has been drained.

For every pound of meat we mix together:
1/2 Tbs chili powder
1 Tbs cumin
1/2 Tbs onion salt
1/2 Tbs garlic

After the meat has cooled it is packaged in quart size freezer bags, approximately one pound per bag for the taco soup and about a pound and a half for taco nights. (Remember, I have five kids)

Wednesday, March 2, 2011

Coconut Lime Cupcakes

I adapted this from a White Cupcake recipe posted on Beantown Baker.  I changed the ingredients a little to make a coconut cupcake, but followed the mixing of the ingredients as in the original recipe.  I have to agree with the author, Jen, that I was a little intrigued by the assembly order of ingredients in the recipe which is why I tried it in the first place.  I've added a tangy lime frosting to make what I consider coconut lime heaven.  I hope you enjoy them as much as I do.

Coconut Cupcakes
2 1/4 cups cake flour
1 cup + 2 tablespoons coconut milk
6 large egg whites, room temperature
1 tablespoon coconut extract
1 1/2 cups + 2 tablespoons sugar
1 1/2 tablespoons baking powder
1 teaspoon salt
3/4 cup butter, softened
1/2 cup shredded coconut

Preheat oven to 350 and prepare cupcake pans.
Whisk together coconut milk, egg whites, and coconut extract.  Set aside.
In your mixing bowl mix together cake flour, sugar, baking powder and salt at a slow speed.  Add butter.  Continue beating on low until the mixture resembles moist crumbs.
Add all but 1/2 cup of the milk mixture and beat at medium speed for 1 1/2 minutes.  Add the remaining milk and beat 30 seconds more.  Scrape the sides of the bowl and beat an additional 20 seconds.
Fold in the shredded coconut.
Pour batter into cupcake liners.  Bake 15 - 17 minutes or until a toothpick entered in the center comes out clean.
Cool on cooling racks.

*** I usually use a 1/4 - 1/3 cup scoop to fill the cupcake liners and have never yet baked them for more than 15 minutes.
Don't try to skimp on the cake flour.  The reality is a box of cake flour can make this recipe at least three times so it is well worth the investment, and you will not get the same results from regular flour because of the higher protein content in other flours.  Just splurge and do it right.

Lime Frosting
4 tablespoons butter, softened
4 ounces cream cheese, softened
3 tablespoons lime juice
5 cups powdered sugar
8 - 10 drops florescent green food coloring or 5 - 6 drops yellow and 3 - 4 drops green

Blend butter and cream cheese together until smooth.
Add lime juice and half the food coloring.  Blend until smooth.
Add 4 cups of powdered sugar and blend together until smooth.  Add additional powdered sugar 1/4 cup at a time until desired consistency is reached.  (I like the frosting thick so it will keep it's form)
Add additional food coloring if desired.
To add a finishing touch, top with zest of lime.

This recipe makes enough to generously frost the batch of cupcakes with a little frosting left over.  If you don't plan to frost as generously I would recommend halving the recipe.

Pancakes

I have always made pancakes and waffles from Bisquick, UNTIL....the dreaded day when everyone wanted pancakes and we were out.  Now, I'm a pretty resourceful person, and seeing that I can read, I decided to grab a cookbook and try by luck at making them from scratch.  I started with a basic recipe, but I decided to use melted butter in the batter instead of oil.  I made the batter and then felt like it was a little too thick for what my family's taste buds.  This resulted in me pouring in a little more milk, adding a little extra of this, changing a little of that, and the result was shocking.  EVERYONE in the family loved the pancakes.

It took a while to figure out exactly what we had done in that first attempt, but I think we have found success, and I we've been making them from scratch ever since.  It definitely wasn't as hard as I always made it out in my mind to be! Even if you never plan on making pancakes from scratch, it's always nice to have a backup plan...I speak from experience.

2 eggs
2 cups flour
2 cups milk
2 Tbs brown sugar1 Tbs lemon juice
1/4 cup butter, melted
2 Tbs baking powder
1/2 tsp salt

Beat the eggs until fluffy, add milk and mix together until frothy.  Add butter, sugar, lemon juice and stir together.  Add flour, baking powder and salt. Stir together until the batter is smooth.  Allow the batter to sit for about fifteen minutes then stir again before pouring.

Pour by 1/4 cup onto griddle.  We have an electric we use that I heat to 350.  When the pancakes are bubbly and starting to be done around the edges flip and cook on the other side.  This makes around twenty pancakes which is perfect for our crew.  The recipe can easily be halved if you don't have as many to cook for.

Orange Chicken

Yet another freezer meal.  This is a most requested meal at our house.  The girls love orange chicken and I am way too frugal to take them out for Chinese food as often as they would like.  We found this recipe on a copycat bulletin board but I was unable to locate the exact recipe again.  There are a few changes from the original, I increased the sauce quite a bit.  You can't tell from the picture because unfortunately in this batch we also added A LOT of chicken since the girls love it so much.  They surprised us and ate it all AGAIN, leaving no lunch leftovers for dad today.


If you choose to freeze this meal, we make the whole recipe, start to finish.  One of the reasons I like to make this as a freezer meal is because the frying of the chicken can be a little time consuming.  If you do it in batches, making three or four meals at a time, on cooking night, you have dinner on the table in the time it makes to cook your rice.  That is a winner in my book.


2 lbs boneless skinless chicken breasts, chopped into bite sized pieces
1 egg
1 1/2 tsp salt 
1 tsp pepper
oil (for frying)
1/2 c cornstarch
1/4 c flour
1 garlic clove, pressed
1/2 tsp crushed red chili pepper
1/4 c green onion, chopped
1 Tbl rice wine
1/2 cup water
2 Tbs cornstarch 
1/2 tsp sesame oil
Orange Sauce for Stir Fry
1/4 c soy sauce
1/4 c water 
1 Tbs ground ginger
3/4 c sugar
3/4 c white vinegar
zest of 1 orange 

Whisk egg, salt, pepper and 1 tablespoon oil and mix well in a large bowl
Place chicken pieces in the bowl and stir to coat.
Stir cornstarch and flour together, and the flour mixture to the chicken, stir to coat.
Heat oil for deep-frying in wok or deep-fryer to 375 degrees. (We use a regular frying pan and turn the chicken)
Add chicken, small batches at a time, and fry 3 to 4 minutes or until golden crisp. Do not overcook chicken. (If you can't cover the chicken with the oil you will need to cook it a little longer)
Remove chicken with slotted spoon and drain on paper towels; set aside.
Clean wok and heat 15 seconds over high heat.
Add 1 tablespoon oil. Add ginger and garlic and stir-fry until fragrant; about 10 seconds.
Add and stir-fry crushed chiles and green onions. Add rice wine and stir 3 seconds.
Add Orange Sauce and bring to boil. Add cooked chicken, stirring until well mixed.
Stir water into remaining 1 tablespoon cornstarch until smooth and add to chicken.
Heat until sauce is thickned. Stir in sesame oil and orange zest.
Serve over rice.

**Note - I did not add the crushed red pepper the first time we made this recipe and EVERYONE loved it.  The second time I made it, I used the red pepper and it had a bit too much heat for my little ones.  It may be wise to omit the pepper if you are nervous about the heat, and allow those who like a spicier dish to add it at the table. 


To freeze this meal: Allow the chicken to cool completely then place the chicken in a labeled gallon size or quart size freezer bags according to your family size.  Lay flat in the freezer.  

On cooking day: Thaw completely.  Reheat the chicken in a covered frying pan on low until warm through, stirring frequently.  I usually start my rice the same time I reheat the chicken and they are typically ready about the same time.


I think the next time I freeze I may try using half the sauce while cooking and freezing half...I'll let you know how that goes!

Saturday, February 26, 2011

Fortune Cookies

For some reason, this year my kids became very excited about Chinese New Year.  They wanted to know what we were doing to celebrate and what we were eating.  This caught me a little off guard because we have no Asian background in our family, but since we were planning to have Asian Chicken Salad for dinner that night anyway, I decided I'd run with it.

We had egg rolls (store bought), Asian Noodles, and homemade fortune cookies.  They were so fun to make that I decided to give it a go again.  Now, this is not a quick and easy treat.  When I am in the zone I can get six done in a batch...when I'm in the norm...more like four before they start drying because I'm not moving fast enough.  I watched a you tube video when I was looking for recipes.  I really wish I could find the clip again to reference it, but I do remember the girl saying to start with two at a time, then gradually work yourself up to six.

Before you start make sure you have your fortunes typed, cut and ready to go.

Preheat oven to 300
Blend together the following until frothy.  Do not beat so long the mixture becomes thick.
     2 large egg whites
     1/2 tsp vanilla
     1/2 tsp almond
     3 Tbs oil
Add to the above:
     1/2 c flour
     1/2 c sugar
     1 1/2 tsp cornstarch
     1 Tbs water
     1/8 tsp salt
Blend the batter together until it's smooth.
Generously grease a cookie sheet.  Use a tablespoon to drop the batter into small circles and spread evenly until it reaches approximately 3" in diameter.  You will probably only be dropping 1/2 - 2/3 of the batter out of the spoon.  That's fine, it should be plenty to create your circle.

  • Bake the cookies for 11 minutes, or until the edges become golden brown.  If the cookies are cooked too long you will not be able to shape them.
  • When the cookies are ready, open the oven and pull the oven rack out enough that you can remove the cookies from the cookie sheet.
  • Remove the cookies one at a time, place the cookie upside down on your working surface, and place the fortune in the center of the cookie.
  • Fold the cookie in half, then using a mug or bowl, fold the cookie in half again using the mug or bowl to help shape the cookie.
  • Place the cookie in a cupcake pan to help hold the shape.
  • Repeat until all the cookies have been removed from the pan. You want to move fast so the cookies won't harden before you shape them, and also because you are pulling them straight from the oven and they're hot!
  • Keeping the cookies in the warmth of the oven will also help keep them from hardening too quickly.
  • Start with 2 cookies on a cookie sheet, then work yourself up to more.  To keep the dough from touching on the cookie sheet, you can most likely do no more than six cookies at a time.

Wednesday, February 23, 2011

Thai Peanut Chicken

This is one of my favorite crockpot dishes, and yes, it is also a hybrid freezer meal.  This was thrown in the crockpot at noon, and dinner was on the table by 5:30 p.m.  The real delay was I didn't start the pasta early enough.  

12 oz. linguine (I used regular spaghetti)
4 cloves garlic, pressed
1 c peanut butter
2 c hot water
2 chicken bouillon cubes
1/2 c low sodium soy sauce
2 Tbs packed brown sugar
1 1/2 lb chicken breast, cut into 1" - 2" chunks
1 1/2 c shredded zucchini
1 large red pepper cut into thin strips
1 c chopped cilantro, divided
1 Tbs lime juice
Chopped peanuts


To freeze: 
Cut the chicken into 1" - 2" chunks and place in a labeled quart size freezer bag.
Cut the red pepper, shred the zucchini, and chop 1/2 c cilantro.  Place items together in a labeled quart size freezer bag.

On cooking day:
Mix together garlic, peanut butter, water, bouillon cubes, soy sauce and brown sugar.  Whisk until well blended.
Place chicken and vegetables in crockpot.  Pour in the sauce and stir.
If you have previously frozen the chicken and vegetables, they can be placed in the crockpot directly from the freezer.  If this is the case, pour the sauce over the chicken and vegetables and stir gently.  
Stir items in the crockpot every 30 minutes to one hour.
Cook on low 4 - 5 hours, or high 2 -3 hours.  (If cooking from frozen cook on low 5 hours, or high 3 hours)
About 20 minutes before serving toss in the lime juice.
Serve over noodles, garnish with peanuts and cilantro.

This recipe was adapted from a recipe found on Karen Petersen's 365 day crockpot blog.

Top Ten Reasons To Use Freezer Meals

1. Save money.  Cooking in bulk means buying in bulk, and it also means you can make sale shopping more valuable for your family. 


2. Save time.  Yes, you are investing a lot of time on one or two days, but the reality is you are investing minimal time on cooking nights, which is all the rest of the nights of the month.  And I don't know anyone who couldn't use some extra time.


3. Forces your family to branch out.  Being part of a freezer meal group means you may get recipes in your home you've never seen before...this is good.  Consider it a time to teach your family to explore.


4. Have meals ready when you need them.  It's always nice when something unexpected happens to know you have a back up plan other than McDonald's.  Not all freezer meals can be made on a moments notice, there are many things you can fully cook and you are dealing with reheating. 


5. Speaking of McDonald's, freezer meals inevitably mean you eat out less.  Knowing you have something for dinner in your freezer makes it a lot easier to avoid the fast food traps.


6. Freezer meals help you plan ahead.  Because you are cooking in bulk, you are also planning in bulk.  You can have a pretty good idea what you plan to eat over the next few weeks which is a lifesaver for those days that you don't know what to cook or just don't feel like cooking.


7.  Gives you an opportunity to cook with friends.  You can obviously do freezer meals on your own, but we're girls, we like to socialize, turn it into a Saturday cooking party, and everyone walks away with meals for their family.


8.  They help with your food storage preparation.  Because you want to have everything non perishable for the meal in advance, you'll be amazed how much of your short term food storage you can build up just from doing freezer meals.  How many side effects do you know of that are good for you?


9.  Cuts down on trips to the grocery store.  With making meals in advance, you know the perishables you need well in advance, making shopping trips a lot easier and less frequent.  We live in a snowbird infested area...keeping me out of those grocery lines. - Priceless!!


10.  Creates no excuses for dinner time with the family.  You have a plan, you have the meal, you can now adjust what your eating to that small window your family has together in the evening.  If you ask me, this is the best reason of all.

Tuesday, February 22, 2011

My kitchen's a mess...and it has nothing to do with dinner

My kitchen is still a disaster, I am soaking everything that needs to soak, updating my blog, going to bed and worrying about the mess in the morning.  This is not typical of me, but I had a cupcake explosion in the kitchen today. I could have totally been on that show Cupcake Wars if I had a cute apron and staff.  Fifteen minutes until we had to leave for mutual, not sure if the chocolate peanut butter cupcakes were cool enough to frost, the lime frosting for the coconut lime cupcakes wasn't as thick as I wanted it...if you have ever watched that show you know exactly what I'm talking about.  Oh, and the minor detail that i have one small oven and limited counter space.  It's good to imagine...Anyway, somewhere in the whole cupcake creating that was happening tonight, I had to worry about dinner for my family.  This is why I LOVE freezer meals.

We have been slacking, so I don't have my dinner calendar written out the way it usually is.  This meant at 4:00 p.m. it occurred to me that I didn't know what we were having for dinner and I certainly did not have time to create something.  So, I opened the freezer, the taco meat was staring me in the face, and I decided that I didn't need to complicate things further by looking around.

I grabbed the romaine lettuce out of the fridge, tomatoes were already cut from last nights salad, opened and drained a can of kidney beans, poured some shredded cheese in a bowl and some tortilla strips.  I will admit that Craig had to make some ranch dressing for those who don't like the salsa contraption (it's just salsa and ranch mixed together) but dinner was done. This is what I consider a hybrid freezer meal, only the taco meat was frozen, but heck, who cares...I didn't have to cook anything, and honestly, from start to finish it took about ten minutes to have dinner completely on the table and ready to go...and that includes the time it took to thaw the meat and have the superstar hubby make the dressing.  I'm not posting a picture, and I'm not posting an official recipe...you can use whatever it is that makes your taco meat yours.   The point is, even if you don't want to live by freezer meals like I do, you should really have something in there as a backup plan.  It is completely worth it!

Now, as for the mess in my kitchen.  I did have someone tell me the coconut lime was the best cupcake she ever had.  I love those.  I changed the recipe up a little today, and am a firm believer I need to make it again before I post to be sure everything is measured out and recorded correctly.  So for now, I'll just tease you with pictures.
  
 
I had made cupcakes for a birthday and used birthday liners...that was a great idea except they looked very silly with these cupcakes.  I took the liner off and it looked even sillier, so the cupcake is just kind of sitting in a new liner...you get the idea though. It's a coconut cupcake with lime frosting.  These are my absolute favorite cupcake, so I was very excited to expand the fan club for these babies.


 I also made a peanut butter chocolate cupcake.  Now, I am a long time fan of peanut butter and chocolate candy, but I've always felt like there were enough chocolate peanut butter cupcakes and I didn't need to jump on the band wagon. Today, I had some of those mini reeses and thought since I was making cupcakes it wouldn't hurt to try. These cupcakes are EXTREMELY rich; after a bite of this one I was thinking milk...and I don't even like milk. These may be a good mini cupcake...hmmm...


Now, the third cupcake was a cookies and cream cupcake.  These were really good, but a bit too heavy for me.  I like a light, fluffy, cupcake, not dense and thick.  A lot of people really liked these, simply because it's a classic, comfortable flavor.  I'll look at lightening up the dough a little before we finalize the recipe, but it definitely had potential. (See what I mean about the tacky cupcake liners now?)


Monday, February 21, 2011

Mexican Lasagna


I have to be honest.  I took photos of dinner tonight and thought to myself, "I'd never make that looking at the picture."  I promise, however, it is REALLY good.  It's a really easy meal, it's just not a photogenic meal. Also, I know there are some who refuse to cook with freezer meals because "they don't do casseroles."  Well, this is a casserole and it is easy, tasty, and even though the photos don't show it, it does look nice when served...


With that said, this is one that can also be a freezer meal.  You can actually prepare the whole meal in a disposable 9x13, cover and freeze.  To freeze the casserole, I recommend covering once with saran wrap and then again with aluminum foil.  Keep in mind there is no way to keep the air out of a frozen casserole, so you absolutely need to eat it with at least a month or month and a half.

We use the hybrid version of the freezer meal for this one.  We cook the chicken, freeze it, separate the cheese for the recipe, freeze it, and separate the tortillas, freeze them.  At that point, the only items that are not frozen are a can of green chiles and the enchilada sauce.  However, it means I only needed about 1/3 of the space also.

Mexican Lasagna

4-5 boneless, skinless chicken breasts
1 Tbs cumin
1 tsp chili powder
2 cans green chiles
2 cups shredded cheese (jack, cheddar, or a colby jack mix)
1 can green enchilada sauce
12 corn tortillas whole
6 corn tortillas halved

To prepare the chicken, we cook it in the crockpot with 1 can of green chiles, the cumin and chili powder.  Cook on low 4 - 5 hours and shred.  (If I am cooking this for multiple meals I will cook up to 16 chicken breasts and add 1 cup of water and 1 bouillon cube)  If you are freezing the chicken, you want to separate into labeled quart size ziploc bags.  Make sure there is at least 3 cups of shredded chicken in each bag.

When I prepare the rest of the meal for the freezer, I make sure I have on had the can of green chiles and the can of enchilada sauce.  Then place the cheese in a labeled quart size freezer bag, and the tortillas in a separate labeled quart size freezer bag.  This will ensure you have all the pieces of the meal on hand when you are planning to prepare it.  (Especially with the cheese if you have a family who likes to add cheese to their snacks or meals.)

To prepare the meal:
Remove 1/4 cup of the shredded cheese and set aside.
If you are using the hybrid frozen chicken, you will need to add the second can of green chiles to the chicken as we only used one in the crockpot.
Preheat oven to 375
Spray a 9x13 pan with nonstick cooking spray.  Pour 3/4 cup of the enchilada sauce in the bottom of the pan, and spread by tilting the pan.  Arrange four of the whole tortillas, and four of the half tortillas to cover the enchilada sauce.  Pour 3/4 cup of the enchilada sauce on top of the layer of tortillas and spread evenly.  Spread evenly 1/2 of the chicken over the tortillas, and then half of the remaining shredded cheese.
Repeat again starting with the corn tortillas, enchilada sauce, chicken and cheese.
To complete the casserole, layer the remainder of the corn tortillas, pour and spread the remainder of the enchilada sauce, and top with the 1/4 cup of cheese that was separated at the beginning.
Bake in preheated oven 35 - 45 minutes, until cheese is melted and it is heated through.
Allow the casserole to set for about ten minutes before serving.

If you choose to prepare the whole casserole before freezing, on serving day you can cook the casserole at 350 for 2 hours from frozen, or thaw ahead of time and cook at 350 for 45 minutes - 1 hour.

Sunday, February 20, 2011

Chicken Alfredo and Rolls

This is one of the simplest meals we prepare in our home, and it is also one of our favorites.

2 boneless, skinless chicken breasts
3/4 c light zesty italian dressing
1 pkg pasta
1 jar alfredo sauce


We serve the meal with rolls and either a vegetable or salad.  I'll include the roll recipe also, but a loaf of french bread from the store works just fine for those who don't like to bake.  We bake the chicken in advance and it is frozen for future meals.

Chicken
Preheat oven to 375.  Lay chicken breasts in an 8x8 or 9x13 pan.  Use a fork to make several holes in the chicken.  Pour half the dressing over the chicken, then turn the chicken over and pour the remainder of the dressing.  Bake the chicken for approximately 40 minutes.  Baking time may vary depending on the thickness of the chicken.

If you are preparing the chicken in bulk for future meals:  Allow the chicken to cool completely.  When the meat has cooled, slice the chicken and then place 2 sliced chicken breasts in a labeled quart size freezer bag.  Squeeze out as much air as possible and place in freezer.

If you are preparing the entire meal tonight:  While the chicken is baking, prepare your pasta, warm the jar sauce and prepare any vegetables or salads that will be accompanying the meal.

I love this meal for a couple reasons.  First, the kids enjoy it so much there are never leftovers.  Second, it's very inexpensive.  If you are a coupon shopper, the Ragu brand of alfredo, which is what we usually purchase, can often be purchased on sale and with coupons for $1.00 or less.

My family also loves italian rolls with their pasta, so that is something else I make whenever we have spaghetti, lasagna, alfredo, anything of that nature.  I use a pampered chef fluted pan.  Any bundt pan will do, but I highly recommend using a bundt pan for these.

 
Rolls
1 c warm water
1 Tbs active dry yeast
2 Tbls + 1 tsp sugar
1 Tbls olive oil
2 1/2 - 3 c flour
2 tsp salt
1 tsp garlic
1 tsp dried oregano
2 Tbls butter

I am a huge fan of my kitchen aid, so that is how I combine the ingredients.  You can use a bread maker, or combine them by hand.  It's entirely up to you.  Pour the water, yeast and sugar into your mixing bowl.  Allow the mixture to sit for five minutes.  You DO NOT have to dissolve the yeast, but you are more than welcome to if it makes you feel better.  While the yeast mixture is sitting, combine 2 cups of flour and the remaining dry ingredients.  You will need the butter for later. After the five minutes add the oil to the water/yeast mixture, then gradually add the flour mixture. Knead the flour until it pulls away from the side of the bowl if using a kitchen aid, or until it pulls away from the board if kneading by hand.  You don't want it to get too dry.

Allow the dough to rest for fifteen minutes.  We don't usually have a warm place for the bread to rise, so I use the inside of my oven.  I preheat the oven to 170, and then turn it off,  By the time the bread has rested it seems to be the perfect temperature.

After the dough has rested punch it down and knead for another minute.  Melt 2 Tbls butter in a small bowl.  Twist and pull enough dough to make a 2" ball.  Dip the ball in butter and place in an un-greased fluted baker or un-greased bundt pan.  Continue until you have used all the dough, spacing the balls evenly and stacking on top of each other in the pan.

Place the pan in the oven for 25 minutes.  After 25 minutes, turn the oven on to 350 and bake for 30 minutes.  Leave the pan in the oven while it's preheating.

After the rolls are finished baking, turn the pan over and serve.

I feel like the tedious part is baking the chicken.  Maybe it's because I have seen the value in baking enough for four meals at once and defrosting seems so much easier, but I'm sure there are those of you who will find me insane for baking the bread...all I know is it is well worth it!

Saturday, February 19, 2011

The Beginnings of my Freezer Cooking

I am a huge man of freezer meal cooking.  I started freezer meal cooking in a small way when I had a very small family.  It's easy to cook a full meal and then eat leftovers for a couple days when you are only cooking for two or three.  In order to spread the leftovers out over a longer period of time I'd cook the entire package of ground beef, season it for tacos, and then freeze half.  This meant the second meal could be eaten in a few weeks, not a few days. As my family grew, I moved away from this because I was able to use the entire contents for one meal.

Over time I joined a freezer meal group.  There were a group of eight with families of comparable sizes.  We each cooked or prepared eight of the same meal, met together once a month to swap the meals, and we walked away with eight different meals for the month.  We had guidelines everyone agreed to and it worked great.  Each month you knew eight of your meals were ready to go.  You could plan them for two of your busy nights each week, or eat them all at once. This type of freezer cooking can be varied depending on the size of your group, the size of your freezers, and your individual needs.

In time we moved away from our freezer meal group and missed the convenience of being able to have those meals available when I needed them.  I missed the variety of the food coming into our home, and having days where I didn't have to think about what to cook.  In our new home our kids were coming home from school later, homework was a little more time consuming, and I realized I needed to do something to help the menu planning.  With no freezer meal group, we decided to try out making our own freezer meal rotation.  We had a friend years ago who had been doing this, and I felt inspired and motivated to make it my own.

Unfortunately, moving also meant we left our second fridge/freezer in the garage at our old home.  So, now I had all the ambition in the world to cook for a month, but only had the freezer in my kitchen to work with.  This created some challenges that we've worked through and I am here to tell you it can be done.  A variety of tasty food from the freezer in your kitchen.

Now, does this mean you won't have to cook at all? Probably not.  There are certain things that require, or are much better cooked the same day.

Does this mean you have to eat the same foods over and over again?  That depends on you and how much variety you want in your menu.  I have found with my family we typically were eating the same foods, or types of foods, over and over anyway.

Are there foods you shouldn't freeze?  Yes, any food with a high water content will not freeze well uncooked.  This doesn't mean you can't freeze these foods, it just means you have to be a little creative.  Science is on your side, and you may have to learn a little about science and freezing in the process.  Relax, no homework and no term papers in these science lessons, just a little experimenting.

So, how do you start?  Read on...

Friday, February 18, 2011

German Pancakes

Tonight is pizza night, so I've decided to post our breakfast recipe.  German pancakes are a favorite of ours, the kids inhale them when I make them, so with our crew I actually have to make two batches at once.  I'm only posting the recipe for one, however.  I know most who make these cook them in an iron skillet, the way they are suppose to be done.  I am not so fancy, we use a 9x13 pan...as you will see from the photos.

 
5 Tbl butter
5 eggs
3/4 c milk
3/4 c flour
1/2 tsp salt


Preheat oven to 450.


Cut the butter into quarters and place in your baking dish.
Beat the eggs well with a hand mixer or kitchen aid.
Add the milk and continue to beat well.
After the oven has been on approximately five to ten minutes, place the baking dish with the butter in the oven. (You want it to be in long enough to heat the pan and melt the butter, but not so long the butter burns)
Add flour and salt to the mixture and mix well.

When the oven is preheated completely, pour the mixture into the pan.  I usually open the oven, pull the oven rack out enough to pour directly into the pan, and slide the rack back into the oven.  I have found this helps from losing too much heat.

Bake for 18 - 20 minutes.

Our personal preference is to serve with sliced strawberries and powdered sugar. Enjoy!